
Last updated July 26, 2026
How Long Does Garage Door Opener Take? Timelines and What to Expect
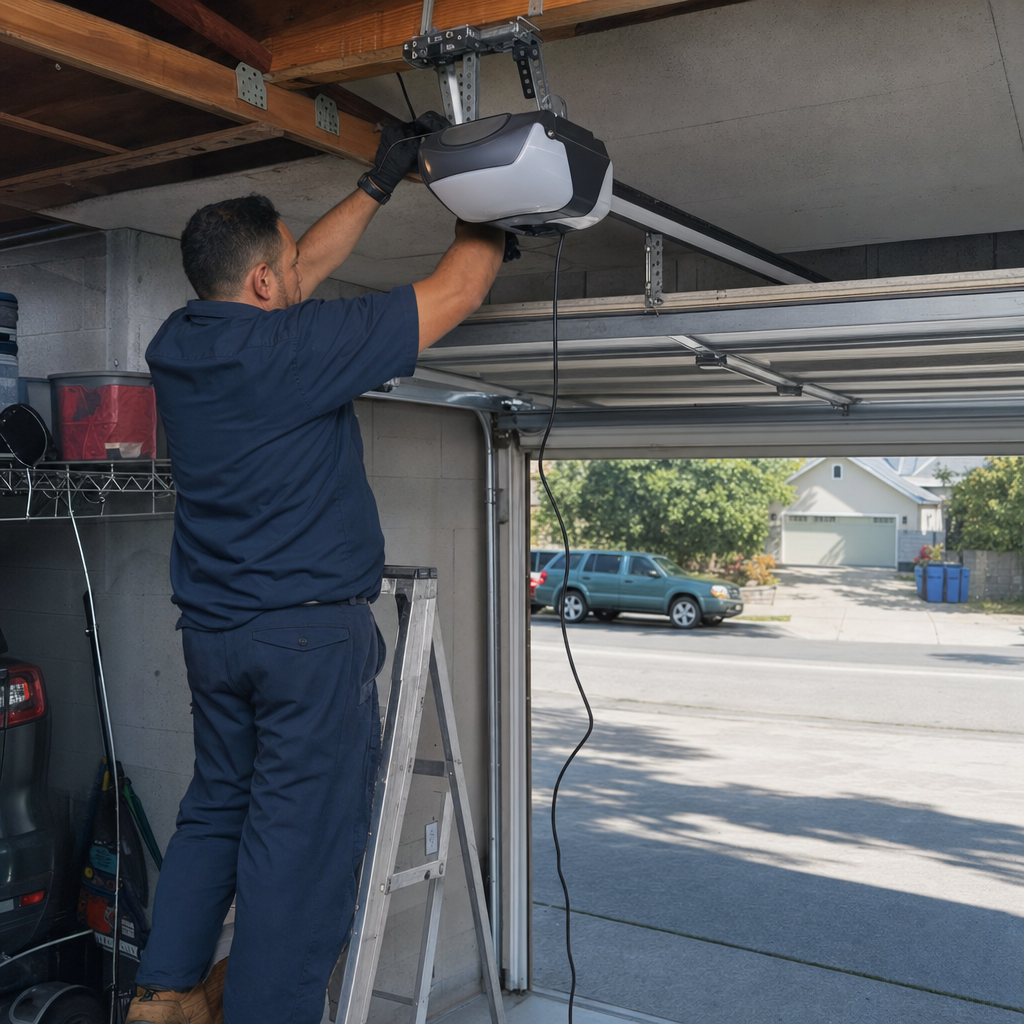
The box says “professional installation in 2 hours.” That’s true when everything lines up. It doesn’t account for the 1963 garage in Los Angeles with a non-standard header, the mismatched wiring from a previous owner’s DIY attempt, or the old opener that was never properly uninstalled and now hangs by its own cord. We’ve been doing this since 1984, and we’ve learned that the two-hour baseline is real, but it hides three variables that routinely double the job. Homeowners who understand those variables can schedule their day accurately instead of blocking out an entire afternoon by default. Here’s what actually fills the time, what extends it, and how to protect your schedule.
Quick Answer
A standard garage door opener installation takes 2 to 3 hours for a professional technician. That includes removing the old unit, installing the new rail and motor assembly, connecting to existing wiring, and programming remotes and safety systems. In Los Angeles, jobs extend to 4 or 5 hours when the garage lacks existing opener wiring, has a low-headroom configuration, or requires door rebalancing before the opener can be properly tuned.
Table of Contents
- What the Standard Two-Hour Install Actually Includes
- Three Conditions That Reliably Extend the Job
- Old Opener Removal: What to Confirm Before the Appointment
- How to Prepare Your Garage to Protect the Two-Hour Estimate
- What “Same-Day Operational” Means in Practice
- Los Angeles-Specific Factors That Affect Timing
- Common Mistakes to Avoid
- When to Call a Professional
- Frequently Asked Questions
- The Bottom Line
What the Standard Two-Hour Install Actually Includes
Most homeowners have never watched an opener go in. They picture a drill, a few screws, and a test run. The reality involves fifteen distinct steps, each with its own tolerance for delay. Understanding what fills those two hours helps set reasonable expectations and explains why a “quick swap” rarely lives up to the name.
Here is the sequence we follow on a typical garage door opener installation in Los Angeles:
- Site assessment and safety lockout. We disconnect power, lock the door in the down position, and verify the door moves freely by hand. If it doesn’t, the opener install becomes a door repair first.
- Old opener removal. Detach the arm from the door bracket, lower the motor assembly, remove the rail from the header bracket, and pull the old wiring. In a clean removal, this takes 20 minutes. In a garage where the previous installer used drywall anchors instead of lag bolts, it takes longer.
- Header bracket installation. The bracket that carries the rail must anchor to structural framing, not just drywall or fascia. We locate the center of the door opening and fasten to the header board with 3/8-inch lag bolts.
- Rail assembly and motor mounting. The rail sections click together, the trolley slides on, and the motor unit hangs from ceiling brackets or sits on a shelf bracket against the wall. Ceiling height determines which configuration works.
- Door bracket and arm connection. The curved or straight arm links the trolley to the door. Its angle at the closed position affects how hard the opener works and how long it lasts.
- Wiring connection. We tie into existing 120-volt outlet wiring and run low-voltage bell wire to the wall button and safety sensors. If the outlet is missing or the existing wire is aluminum, this step expands.
- Safety sensor alignment. The photo eyes must sit 6 inches from the floor, facing each other, with a clear line of sight. A bump from a trash can or a shifted box spring breaks the beam and prevents closing.
- Limit and force setting. We program how far the door travels up and down, and how much resistance triggers reversal. This is where a door that is too heavy or poorly balanced will fail testing.
- Remote and keypad programming. Each transmitter learns the opener’s frequency. Keypads mount outside and require a separate PIN setup.
- Safety reversal test. A 2×4 laid flat on the floor must trigger reversal when the door contacts it. Federal law requires this function; we document it.
- Final inspection and cleanup. We torque-check fasteners, verify the emergency release works, and walk the homeowner through operation.
Steps 1 through 6 consume roughly 75 minutes in ideal conditions. Steps 7 through 11 add another 45 minutes. That is your two-hour baseline, and it assumes the door is balanced, the wiring is copper and intact, and the header is standard height with solid backing.
Three Conditions That Reliably Extend the Job
After four decades in Los Angeles garages, we’ve identified three conditions that predictably push a job past the two-hour mark. None of them are flaws in the opener or the technician. They are structural realities that homeowners can spot in advance if they know what to look for.
No Existing Opener Wiring to Pull From
In garages built before 1980, especially in neighborhoods like Highland Park, Eagle Rock, and parts of the San Fernando Valley, the electrical setup often consists of a single overhead light socket on a switch loop. There is no dedicated outlet near the opener location. Running new Romex from the panel or tapping a nearby circuit adds 45 to 90 minutes, depending on attic access and whether the panel has capacity. We see this in roughly one of every four older Los Angeles homes.
The additional time includes:
- Shutting off the circuit and verifying dead wires
- Drilling through top plates and running cable
- Installing a proper outlet box and GFCI receptacle where required by current code
- Patching access holes and restoring power
Homeowners can save this time by having an electrician pre-install the outlet, or by confirming with us during scheduling that we should bring conduit and wire.
Low-Headroom Configuration
Standard garage doors need 12 to 14 inches of headroom above the door opening for a standard opener rail. In Los Angeles, where homeowners convert carports to enclosed garages or add rooms above existing structures, we regularly see 8 to 10 inches of clearance. This requires a low-headroom track system or a wall-mount jackshaft opener instead of a traditional trolley-style unit.
Switching to a jackshaft opener (brands like LiftMaster or Chamberlain make reliable ones) eliminates the rail entirely but introduces its own requirements: a torsion spring system in good condition, adequate side-room for the motor housing, and sometimes a separate power run to the side wall. The decision point adds consultation time, and the installation differs enough from standard practice that even experienced technicians slow down to verify clearances.
Door Rebalancing Before Opener Tuning
An opener should not lift a door. It should guide a door that is already in balance. When we disconnect the opener and the door feels heavy, drifts down, or binds in the track, we cannot proceed with limit and force settings until the door is corrected.
In Los Angeles, where coastal moisture in Venice or Marina del Rey causes rust and inland heat in the Valley dries out lubricant, spring fatigue and track misalignment are common. Rebalancing involves adjusting spring tension, aligning rollers, and sometimes replacing worn cables. This is a separate repair that adds 30 to 60 minutes to the appointment. It is not optional. An opener installed on an unbalanced door will strain, overheat, and fail prematurely. We won’t do it, and any technician who does is selling you a future callback.
Old Opener Remover: What to Confirm Before the Appointment
Here is a detail that catches homeowners off guard: removal of the old opener is not always included in quoted labor. Some companies price installation only, assuming the homeowner has already cleared the space. Others include removal but charge disposal fees. At Mainspring Garage Door Co., we state the full price before the wrench comes out, and that price includes removal and responsible disposal. But we are not the only company in Los Angeles, and we have rescued enough homeowners from surprise bills to know this matters.
Before you book, ask these questions:
- Does the quoted price include removal of the existing opener and rail?
- Is disposal included, or will the old unit be left on the curb?
- If the old opener is hard-wired rather than plug-in, does the quote cover electrical disconnection and capping?
- What happens if the old brackets have damaged the header board and need repair before the new bracket goes in?
We have seen garages in Los Angeles where the previous installer bolted through a decorative fascia board with no backing, leaving a splintered mess. Repairing that header properly takes time and material. A company that quotes low and invoices high will treat this as an add-on. A company that quotes honestly will inspect first and warn you. Our garage door repair in Los Angeles includes a pre-install walkthrough for exactly this reason.
How to Prepare Your Garage to Protect the Two-Hour Estimate
Homeowners can do more to protect the timeline than they realize. The technician’s time on site is only part of the equation. Access, clearance, and information determine whether those two hours stretch to four.
Clear the Area Completely
Remove vehicles, storage bins, bicycles, and anything within 8 feet of the door tracks and the centerline of the ceiling. We need ladder placement on both sides of the door and a clear path to bring in the new opener box and rail sections. In Los Angeles, where garage square footage is often converted to storage, this step is frequently overlooked. A technician who spends fifteen minutes shifting boxes is a technician who is not installing your opener.
Locate and Test the Outlet
Find the outlet the opener will use. Plug in a lamp or phone charger to confirm it is live and properly grounded. If the outlet is controlled by a wall switch, note that we will need to discuss rewiring. If there is no outlet within 6 feet of the opener location, call us in advance so we can plan the electrical run.
Pull Your Existing Hardware Specs
If you know the brand and model of your current door and opener, write it down. If you have the original installation manual, leave it out. This information helps us bring compatible brackets, arms, and wiring adapters on the first trip. Our trucks carry springs, cables, and openers for all major brands, including Clopay, Amarr, and Wayne Dalton, but knowing what we are walking into lets us pull the right configuration before we leave the shop.
Verify Ceiling and Wall Condition
Look up. Is the ceiling drywall sagging around the old opener mount? Are there water stains that might indicate a leak above the header? In Los Angeles, where El Niño winters follow long dry spells, deferred roof maintenance shows up as softened drywall or compromised framing. We cannot safely anchor a motor to deteriorated material. Addressing this requires a carpenter or roofer, and it will delay the opener install until the structure is sound.
What “Same-Day Operational” Means in Practice
When we say you’ll be operational the same day, we mean the door opens and closes by remote, the keypad works, and the safety systems are tested. That final phase, steps 7 through 11 from our earlier list, takes 20 to 30 minutes by itself. Homeowners are sometimes surprised by this. They picture programming as a single button press. In reality, it is a methodical verification process that protects both function and liability.
Here is what those 20 to 30 minutes include:
- Remote learning. Each handheld remote and vehicle-integrated HomeLink system must learn the opener’s rolling code. This requires pressing a learn button on the motor unit, then pressing the remote button within 30 seconds. Multiple remotes mean multiple cycles.
- Keypad PIN setup. Wireless keypads mount with two screws and program similarly, but they also require a temporary PIN for testing and a permanent PIN for handoff. We walk the homeowner through changing it later.
- Travel limit fine-tuning. The door must stop precisely at the open and closed positions. Too far up and the door hits the opener rail or header. Too far down and the motor strains against the floor.
- Force setting verification. We test the force required to trigger reversal at multiple points in the travel. This prevents the door from crushing an obstruction and also prevents false reversals that leave the door stuck open.
- Safety sensor beam test. We interrupt the beam during closing at multiple heights. The door must reverse within 2 seconds.
- Contact reversal test. The 2×4 on the floor test. The door must reverse on contact.
- Emergency release demonstration. We show the homeowner how to pull the red handle to disengage the opener and lift the door manually during a power outage.
Skipping any of these steps would save time and cost us callbacks. We don’t skip them. The 90-Day Done Right Promise means we come back at no charge if anything is not right, so we verify everything before we leave. That 20 to 30 minutes is time well spent.
Los Angeles-Specific Factors That Affect Timing
Geography and regulation in Los Angeles introduce variables that a national guide cannot predict. We have learned to account for them in our scheduling.
Seismic bracing requirements. Los Angeles building codes require garage door bracing in certain seismic zones, particularly in hillside areas like the Hollywood Hills, Pacific Palisades, and parts of the Santa Monica Mountains. If your installation triggers a permit or inspection requirement, the timeline extends by days, not hours. We handle the permit application when needed, but we cannot control inspection scheduling.
Coastal corrosion. In beach-adjacent neighborhoods from Malibu to San Pedro, salt air corrodes track hardware and opener brackets faster than inland climates. We inspect for this during site assessment. Replacing corroded fasteners or track sections before the opener goes in protects the new installation but adds time.
HOA notification and design review. Many Los Angeles condominiums and planned communities require architectural review for exterior changes, including garage door style and opener noise levels. We have worked with HOAs in Playa Vista, Downtown LA, and Pasadena where the approval process adds a week or more. Homeowners should verify requirements before scheduling.
Parking and access constraints. In dense neighborhoods like Koreatown, Westlake, and parts of Silver Lake, our technicians sometimes park two blocks away and carry tools and parts to the job. We build this into our dispatch planning, but homeowners who reserve driveway access save us that transit time and protect their appointment window.
Common Mistakes to Avoid
- Buying the opener before measuring the garage. Big-box retailers in Los Angeles stock standard-height openers. If your garage has low headroom or a high-lift track, that opener will not fit. We measure first and recommend the right unit, including jackshaft options when needed.
- Assuming all openers are equally quiet. Belt-drive units run quieter than chain-drive, but they cost more. In a Los Angeles duplex or townhouse with shared walls, the noise difference affects neighbors. We help homeowners choose based on their actual situation, not just price.
- Ignoring the door’s condition. A new opener on a worn door is a short-term fix. We inspect springs, cables, and rollers during every install. If the door needs work, we say so before we start.
- DIY wiring in older garages. Los Angeles has thousands of unpermitted garage conversions with substandard electrical. We have found aluminum wiring, overloaded circuits, and exposed splices. We will not connect an opener to unsafe power. The fix is usually straightforward, but it is not optional.
- Disposing of the old opener improperly. Openers contain motors and circuit boards that Los Angeles sanitation does not accept in regular bins. We haul away and recycle old units as part of our standard service.
- Programming only one remote and losing the others. We program every remote the homeowner provides, plus vehicle systems, and we leave written instructions for adding future devices. Losing a remote and not knowing how to replace it is a common and avoidable frustration.
- Skipping the safety test because “it looks fine.” The federal mandate for auto-reverse exists because children and pets have been killed by garage doors. We test every install, every time, and we show the homeowner the result.
When to Call a Professional
Call a professional when the job involves overhead lifting, spring tension, or electrical connection beyond a simple plug-in. Garage door springs store lethal energy. A torsion spring wound tight can cause serious injury or death if mishandled. Opener installation also requires precise alignment of the rail, proper force calibration, and verified safety function. These are not homeowner projects.
Specifically, contact Mainspring Garage Door Co. if your garage has any of the following: low headroom, no existing outlet, an unbalanced door, corroded hardware from coastal exposure, or a previous DIY install that you suspect was done incorrectly. We offer free estimates in Los Angeles. A technician will assess your garage, explain what the job requires, and state the flat price before any work begins. Call (844) 755-5838 to schedule.
Frequently Asked Questions
A standard installation takes 2 to 3 hours for a trained technician. In Los Angeles, jobs extend to 4 or 5 hours when the garage lacks proper wiring, has a low-headroom configuration, or requires door rebalancing first. Call (844) 755-5838 for a free estimate on your specific garage.
You can, but we do not recommend it. The rail assembly is heavy and awkward, the electrical connection must meet code, and the safety systems require calibrated testing. More critically, if the door is not properly balanced, the opener will fail prematurely and may create a hazard. Our technicians are trained journeymen who verify every function before leaving.
It depends on the company. Some quotes cover installation only. At Mainspring Garage Door Co., removal, disposal, and recycling of the old unit are included in our flat price, which we state before work begins. Always confirm this when comparing estimates.
Belt-drive openers from LiftMaster or Chamberlain are the quietest standard options. For extremely noise-sensitive situations, a wall-mount jackshaft opener eliminates rail vibration entirely. We assess your garage layout and recommend accordingly.
Disconnect the opener using the red emergency release handle. Lift the door halfway by hand and let go. A balanced door stays in place. If it drifts up or down, the springs need adjustment. Do not attempt this yourself. Spring tension is dangerous and requires proper tools and training.
Most residential opener replacements do not require a permit. However, if the installation involves new electrical circuits, seismic bracing, or is part of a larger garage modification, Los Angeles building codes may apply. We handle permit applications when needed and advise homeowners during the estimate.
The Bottom Line
The two-hour opener install is real, but it is not universal. It applies to standard garages with existing wiring, adequate headroom, and a door in good balance. In Los Angeles, where housing stock spans a century of construction methods, three conditions routinely extend the timeline: missing or inadequate electrical, low headroom requiring specialized hardware, and doors that need rebalancing before the opener can be tuned safely. Homeowners who clear the area, locate their outlet, and communicate their garage’s specifics in advance protect their schedule and avoid surprises. The final programming and safety testing takes 20 to 30 minutes and is never optional. A door that opens is not enough. It must open safely, every time, with verified protection for the people and property behind it.
Written by the team at Mainspring Garage Door Co., serving Los Angeles since 2016.