
Last updated July 26, 2026
Garage Door Opener Maintenance Schedule: What to Do and When
The average garage door opener is replaced every 10 to 15 years. The ones that reach 20 years are not lucky - they are the ones where someone spent 25 minutes per year on four simple tasks. In Los Angeles, where summer heat in the Valley can push garage temperatures past 110°F and coastal humidity on the Westside quietly corrodes metal components, that small investment of time pays back double. This guide gives you a 12-month maintenance calendar broken into three levels: one annual deep check, two semi-annual inspections, and four quick monthly tasks. Follow it, and you will prevent the three failures that force most replacements - stripped drive gears, fried logic boards, and safety sensor malfunctions that cascade into bigger problems.
Quick Answer
A garage door opener needs four monthly tasks (visual inspection, safety reversal test, rail lubrication check, and remote battery test), two semi-annual tasks (roller lubrication and force setting verification), and one annual deep inspection (drive gear wear check, chain or belt tension, and full hardware torque). Total time per year: under 30 minutes. In Los Angeles, add one extra semi-annual check if your garage faces afternoon sun in the San Fernando Valley or inland neighborhoods, where heat accelerates belt and chain wear.
Table of Contents
- Why a Schedule Matters More Than a Checklist
- Monthly Tasks: 5 Minutes Each
- Semi-Annual Tasks: 10 Minutes in Spring and Fall
- Annual Deep Inspection: 15 Minutes Once a Year
- What Goes Where: The Right Lubricant for Each Part
- How Los Angeles Climate Changes Your Schedule
- Common Mistakes to Avoid
- When to Call a Professional
- Frequently Asked Questions
- The Bottom Line
Why a Schedule Matters More Than a Checklist
Most homeowners have seen a garage door maintenance checklist. Few have followed one for five consecutive years. The difference between a checklist and a schedule is the difference between intention and action - a schedule lives on your calendar, not your to-do list.
In our 42 years of service, we have replaced thousands of openers that failed from neglect, not age. The pattern is consistent. A 12-year-old LiftMaster in Pacific Palisades with a stripped drive gear. A 10-year-old Genie in Studio City with a cracked logic board from vibration. A 14-year-old Chamberlain in Echo Park that ran until the chain snapped because no one checked tension. Each failure was preventable. Each would have taken less than 30 minutes of cumulative attention per year.
The schedule below is built on three principles:
- Frequency matches failure mode. Safety sensors need monthly attention because dust and spider webs accumulate fast. Drive gears need annual inspection because wear is gradual and invisible until catastrophic.
- Task difficulty escalates with frequency. Monthly tasks require no tools. Semi-annual tasks need a ladder and basic supplies. The annual inspection involves opening the motor housing - the one task many homeowners skip, and the one that saves the most money.
- Local conditions adjust timing. Los Angeles is not one climate. A garage in Woodland Hills faces different stress than one in Santa Monica, and the schedule accounts for both.
The 90-Day Done Right Promise we offer on every job exists partly because we see what happens without maintenance. We would rather help you avoid the call entirely.
Monthly Tasks: 5 Minutes Each
These four tasks take roughly one minute each. Perform them on the first Saturday of the month, or tie them to another monthly habit - changing HVAC filters, testing smoke detectors.
1. Visual Inspection of the Full System
Stand inside the garage with the door closed. Look at every component in the opener’s path: the rail, chain or belt, trolley, emergency release rope, and safety sensors. You are checking for three things:
- Anything hanging, dangling, or detached
- Visible rust, corrosion, or fraying on the chain or belt
- Spider webs, dust, or debris blocking the safety sensor lenses
In Los Angeles, dust from Santa Ana winds can coat sensor lenses in a single dry week. A quick wipe with a dry cloth restores function.
2. Safety Reversal Test
This is not optional. Federal law (UL 325 standard) requires every automatic garage door opener manufactured since 1993 to reverse direction when encountering obstruction. The test is simple:
- Fully open the door.
- Place a 2×4 board flat on the floor, centered under the door path.
- Close the door using the wall button (not the remote).
- The door must reverse within 2 seconds of contact with the board.
If it does not reverse, or if it reverses before touching the board, the down-force setting needs adjustment. Do not attempt this adjustment yourself - the force settings control a motor powerful enough to cause serious injury. This is the point to call a trained technician.
3. Rail Lubrication Check
Run the opener and listen. A dry rail produces a metallic scraping or grinding sound distinct from normal motor hum. The trolley should glide silently. If you hear noise, the rail needs lubrication - covered in the semi-annual section.
4. Remote Battery Test
Press the remote from inside the garage while watching the opener. A slow or delayed response often means weak batteries. Replace them before they fail completely - a dead remote in an emergency is a problem you do not need.
Semi-Annual Tasks: 10 Minutes in Spring and Fall
These tasks require a stepladder, a rag, and the correct lubricants. Schedule them for April and October - after the worst of Santa Ana season and before winter rains.
1. Roller and Hinge Lubrication
With the door closed, apply white lithium grease to each roller bearing and each hinge pivot point. Use a cloth to catch drips. Operate the door twice to distribute the lubricant.
Critical distinction: lubricate the bearings, not the rollers themselves. Grease on nylon rollers or on the track creates a sticky residue that attracts dust and actually increases friction over time.
2. Chain or Belt Tension Check
A properly tensioned chain or belt has approximately 1/2 inch of sag at midpoint when the door is closed. Too tight strains the motor and accelerates drive gear wear. Too loose causes slapping, jerking, and premature sprocket failure.
On belt-drive openers (common in newer homes from Clopay and Amarr installations), check for cracks, fraying, or glazing - a shiny, hardened surface that indicates heat damage. Belt drives run quieter than chain drives but are more sensitive to overtightening and heat exposure.
3. Force Setting Verification
This requires a force gauge or the manual test method. With the door fully open, place a bathroom scale on the floor centered under the door. Close the door and note the force reading at reversal. The door should reverse at 15 pounds of force or less.
If you do not have a scale, use the manual resistance test: with the door disconnected from the opener (pull the emergency release), lift the door halfway and release. It should stay in place. If it falls or shoots upward, the door spring balance is off - a separate issue that overloads the opener and must be corrected by a professional. Garage door springs are under extreme tension and can cause severe injury or death if mishandled. This is not a DIY repair.
Annual Deep Inspection: 15 Minutes Once a Year
This is the inspection most homeowners skip. It is also the one that prevents the most expensive failures. Schedule it for January, when holiday travel is done and the garage gets normal use again.
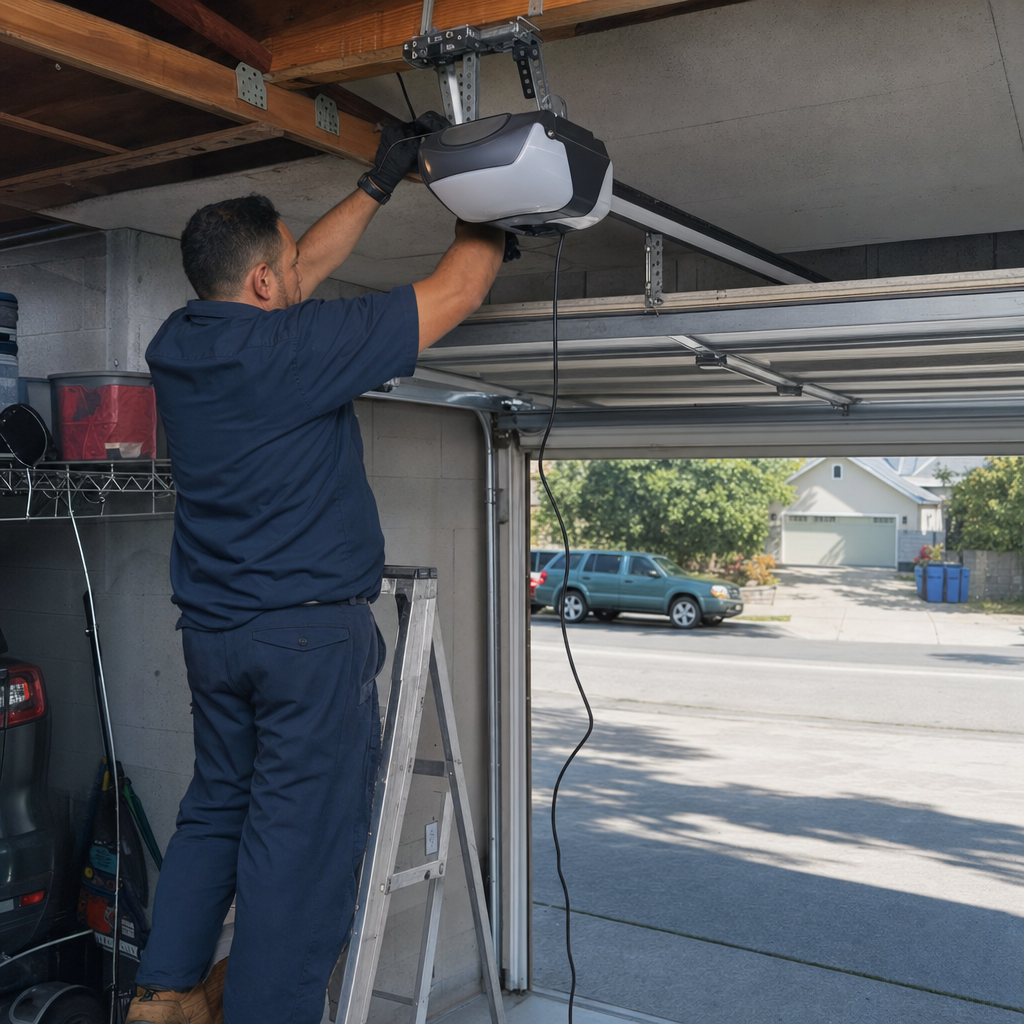
Step 1: Open the Motor Housing
Unplug the opener. Remove the light lens and any access panels. On most LiftMaster, Chamberlain, and Craftsman units, the main gear assembly is visible once the lens is off. Genie and Raynor units may require removing one or two screws.
Step 2: Inspect the Drive Gear
The drive gear is a white or beige plastic gear that meshes with the worm drive on the motor shaft. Look for:
- Cracks radiating from the center bore
- Teeth that appear worn, rounded, or chipped
- Grease that has turned gray or contains metal particles
A healthy gear has sharp, square teeth and clean amber or white grease. A failing gear gives warning signs: grinding on startup, a brief pause before the door moves, or a “clicking” sound before engagement. By the time these symptoms are obvious, the gear is often days from stripping completely - and when it goes, it can damage the motor shaft or logic board.
Drive gear replacement is a 30-minute job for a trained technician with the right parts. Motor replacement is a full opener replacement. The annual inspection turns the second scenario into the first.
Step 3: Check Chain or Belt Sprocket
The large sprocket at the motor head should rotate smoothly with minimal play. Excessive wobble indicates worn bearings that will soon allow the chain or belt to jump teeth.
Step 4: Torque All Hardware
Using a socket wrench, check the rail mounting bolts, motor head bolts, and hanging bracket fasteners. Vibration loosens these over years. A loose rail flexes under load, stressing every component.
Step 5: Test the Capacitor
On older openers (10+ years), the start capacitor may show bulging, leakage, or corrosion at the terminals. A failing capacitor causes hard starting, humming without movement, or intermittent operation. Capacitors store electrical charge even when unplugged - do not touch terminals directly.
What Goes Where: The Right Lubricant for Each Part
WD-40 is the most common mistake we correct. It is a solvent and water displacer, not a lubricant. Sprayed on a garage door chain or rail, it strips existing grease, attracts dust, and creates an abrasive paste that accelerates wear. We have replaced drive gears in 8-year-old openers that should have lasted 15, solely because the homeowner used WD-40 quarterly.
| Component | Correct Lubricant | Why |
|---|---|---|
| Chain or screw drive | White lithium grease (spray or tube) | Stays in place, handles load, resists sling-off |
| Belt drive rail | Silicone-based lubricant or manufacturer-specified belt lube | Does not degrade rubber or polyurethane compounds |
| Roller bearings | White lithium grease | Penetrates bearing, protects from moisture |
| Hinge pivot points | White lithium grease or light machine oil | Reduces friction without attracting debris |
| Torsion spring | Light coating of lithium grease | Prevents corrosion binding; spring must move freely |
| Safety sensor lenses | Dry cloth only | Any residue attracts dust and blocks beam |
For Wayne Dalton openers with their proprietary torque tube system, use only the manufacturer-recommended lubricant. The torque tube operates under different mechanical stress than standard rail systems, and incorrect lubrication voids warranty coverage.
How Los Angeles Climate Changes Your Schedule
Los Angeles spans multiple microclimates, and your garage’s location affects opener wear more than most homeowners realize.
San Fernando Valley and Inland Empire-facing neighborhoods: Encino, Van Nuys, Northridge, and similar areas see garage temperatures exceed 110°F in July and August. Heat degrades belt compounds, thins grease, and accelerates capacitor aging. If your garage has western exposure and minimal ventilation, perform the semi-annual inspection three times yearly - April, August, and October. Check belt condition in August specifically; glazing or hardening indicates thermal damage.
Coastal zones: Santa Monica, Venice, Marina del Rey, and Palos Verdes experience marine layer moisture that corrodes metal components faster than inland areas. Chain drives show surface rust within two years if unprotected. Increase chain lubrication frequency to quarterly, and inspect the emergency release rope for mildew or weakening - a snapped rope is a safety hazard if you need to disengage the opener manually.
Hillside homes: Areas like Laurel Canyon, Beachwood Canyon, and the Hollywood Hills often have garages with uneven floors or sloped driveways. The opener works harder to pull the door uphill and must brake harder on descent. Check force settings more frequently - every four months instead of six - and watch for rail mounting stress where the angle changes.
Fire zone adjacency: Homes near recent burn areas or in high-risk zones (Topanga, Malibu, parts of the Foothills) accumulate ash and particulate matter during fire season. This dust is abrasive and electrically conductive. Clean the motor housing exterior and ensure vents are unobstructed after significant smoke events.
Common Mistakes to Avoid
- Using WD-40 as a lubricant. It strips protective grease and creates an abrasive film. We have replaced prematurely failed openers in Brentwood and Pasadena where this was the sole cause.
- Lubricating the track. The rollers roll; they do not slide. Grease on the track collects dust and causes binding. Clean tracks with a dry cloth only.
- Ignoring the emergency release. Test monthly that the red handle pulls smoothly and the trolley disengages. In a power outage or opener failure, this is your manual exit.
- Adjusting force settings without a gauge. Guessing at force adjustment creates a dangerous condition - too much force and the door will not reverse on a child or pet. This adjustment requires proper measurement.
- Skipping the annual drive gear inspection. It is the only task requiring opening the housing, and it is the one that prevents the most expensive failure. Set a calendar reminder.
- Neglecting wall button wiring. Frayed or chewed low-voltage wiring at the wall button causes intermittent operation that homeowners blame on the opener. Inspect annually.
- Assuming all brands age the same. A Craftsman chain drive from 2008 and a current LiftMaster belt drive have different maintenance needs. Check your manual, or call for guidance specific to your model.
When to Call a Professional
Some maintenance tasks require training and equipment. Call a technician if you encounter any of the following:
- The door does not reverse during the safety test, or reverses inconsistently
- You see cracks, missing teeth, or metal contamination in the drive gear
- The chain or belt has more than 3/4 inch of sag or visible damage
- The opener hums but does not move, or starts hard with a jerk
- Any spring, cable, or bottom bracket issue - these components are under lethal tension
- You are uncomfortable with any step involving electrical components or ladder work
Garage Door Opener in Los Angeles service from Mainspring Garage Door Co. includes full inspection, adjustment, and the 90-Day Done Right Promise on all work. We offer free estimates - call (844) 755-5838 to schedule.
Frequently Asked Questions
Professional opener maintenance typically runs $89 to $150 in the Los Angeles market, depending on whether it is bundled with a full door tune-up. Mainspring Garage Door Co. offers an $89 Seasonal Tune-Up that covers the opener, door, spring, and safety system. Call (844) 755-5838 for an exact quote - estimates are free.
You can handle monthly visual checks, safety tests, and remote battery replacement safely. Semi-annual lubrication and tension checks are within reach of most homeowners with a stable ladder. The annual drive gear inspection, force setting adjustment, and any work involving springs or cables should be performed by a trained technician. Garage door springs store enough energy to cause serious injury or death if released improperly.
With proper maintenance, a quality opener lasts 15 to 20 years in Los Angeles. Without maintenance, the typical lifespan drops to 10 to 12 years, with premature failures common at 8 years in high-heat Valley garages. Coastal moisture accelerates corrosion in chain-drive units, reducing effective lifespan by 2 to 3 years if unaddressed.
Repair is usually more economical if the unit is under 12 years old and the failure is isolated - a worn drive gear, failed capacitor, or misaligned safety sensor. Replacement makes more sense when the opener exceeds 15 years, has multiple component failures, or lacks modern safety features like rolling-code remotes and force-limiting technology. We provide free second opinions on any written estimate to help you decide.
Heat thins lubricants, expands metal components, and stresses capacitors and motor windings. In Los Angeles Valley garages, afternoon temperatures can exceed the thermal design limits of older openers. If your opener struggles specifically in July and August, the motor may be overheating or the belt may have thermally degraded. Increase inspection frequency and ensure garage ventilation.
LiftMaster and Chamberlain (same parent company, Chamberlain Group) have the widest parts availability and most documented maintenance procedures. Genie units are reliable but use some proprietary components. For newer installations, belt-drive models from any major brand require less frequent lubrication than chain drives but are more sensitive to heat and tension adjustment. We are factory-familiar with all major brands and can advise on your specific model.
The Bottom Line
A garage door opener maintained on a calendar outlasts one maintained by complaint. The schedule is simple: four monthly tasks at five minutes each, two semi-annual inspections at ten minutes each, and one annual deep check at fifteen minutes. Under thirty minutes per year. The alternative is a $400 to $800 replacement that could have been a $150 repair - or prevented entirely.
In Los Angeles, adjust for your microclimate. Valley heat demands extra attention to belts and capacitors. Coastal moisture requires more frequent chain care. Hillside homes need closer force monitoring. The specifics matter because the conditions are specific.
We have been serving Los Angeles homeowners since 1984. The openers we installed in the 1990s that are still running all have one thing in common: someone followed a schedule.
Ready to have your opener inspected by a technician who arrives with the right parts on the truck, states the price upfront, and stands behind the work in writing? Call Mainspring Garage Door Co. at (844) 755-5838 for a free estimate. Our $89 Seasonal Tune-Up covers the full system, and every job carries the 90-Day Done Right Promise - if it is not right, we make it right, no paperwork, no arguing.
Written by the team at Mainspring Garage Door Co., serving Los Angeles since 2016.