
Last updated July 26, 2026
DIY vs Professional Garage Door Opener: What’s Safe to Do Yourself
You can install a garage door opener yourself. The question isn’t whether you’re capable - it’s whether your ceiling, wiring, and existing hardware will cooperate. They often don’t. In 42 years of running Mainspring Garage Door Co., we’ve seen more half-finished DIY opener jobs in Los Angeles garages than we can count. Most started with a Saturday morning trip to the hardware store and ended with a call to us on Sunday evening. This guide names exactly which parts of the job are genuinely safe to handle yourself, which steps carry real injury risk, and how to read your own garage before you buy a single bracket.
Quick Answer
Three tasks are genuinely safe for most homeowners: assembling the rail, attaching the trolley, and programming remotes. Two tasks belong to a trained professional: any work involving the high-tension spring system and any 240V electrical upgrade. The hidden variable is your garage ceiling itself - low headroom, angled joists, or inadequate header bracket clearance will turn a straightforward project into a frustrating, sometimes dangerous, weekend.
Table of Contents
- The Three Tasks That Are Genuinely Safe to DIY
- The Two Tasks That Carry Real Risk
- How to Assess Your Garage Ceiling Before Buying a Kit
- Why Low-Headroom and High-Lift Configurations Should Not Be DIY
- The Actual Cost Comparison: DIY Savings vs. Callback Costs
- What the Major Brands Don’t Explain Clearly
- Common Mistakes to Avoid
- When to Call a Professional
- Frequently Asked Questions
- The Bottom Line
The Three Tasks That Are Genuinely Safe to DIY
Most our Garage Door Opener services kits from Chamberlain, Genie, and other major manufacturers are designed with homeowner assembly in mind. The factory knows that rail sections snap together, the trolley slides onto a pre-threaded screw or chain, and remote pairing involves holding a button until an LED blinks. These three tasks are where DIY makes sense.
1. Rail Assembly
The rail comes in three or four interlocking sections. You lay them on the garage floor, align the holes, and secure with the provided bolts. No overhead work, no electrical connections, no load-bearing decisions. The trickiest part is keeping the rail straight while you tighten - a second pair of hands helps, but one person can manage with a pair of sawhorses or even a couple of five-gallon buckets.
What we’ve noticed in Los Angeles: older homes in neighborhoods like Eagle Rock or Highland Park often have slightly uneven concrete floors from decades of settling. This matters because a rail assembled on a sloped floor will carry that twist upward when mounted. Lay a long level across your assembly surface before you start. Five minutes of checking saves an hour of reworking.
2. Trolley Attachment
The trolley is the piece that travels along the rail and connects to the door arm. Attaching it is mechanical and intuitive - slide, click, verify it moves freely. The only specification to watch is the release cord position. If you mount the trolley backward, the emergency release becomes awkward to reach. The manual shows this clearly; most errors come from skipping the diagram.
3. Remote and Keypad Programming
Modern openers use rolling-code technology. Programming involves pressing a learn button on the motor unit, then pressing a button on the remote within 30 seconds. Wall consoles and wireless keypads follow similar logic. If you can program a car’s garage door HomeLink, you can handle this step.
One Los Angeles-specific note: our mild climate means fewer temperature-related electronics failures than colder markets, but the dry season brings static electricity. We’ve had customers call because a keypad “died” in January when it was simply holding a static charge. Touching a grounded metal surface before pressing learn buttons prevents this.
The Two Tasks That Carry Real Risk
This is where the tone of this guide changes. The following two tasks injure homeowners every year. We do not describe how to perform them. We describe why they require training, proper tools, and an understanding of forces that are not visible until they release unexpectedly.
High-Tension Spring Work
Your garage door weighs between 150 and 400 pounds. The spring system - torsion springs above the door or extension springs along the tracks - stores the energy needed to lift that weight. A wound torsion spring holds enough force to break bones or cause fatal head trauma if it unwinds uncontrollably.
Opener installation sometimes requires spring adjustment. The new opener may change the door’s balance point. The header bracket may need to shift, which affects cable geometry. A door that was “good enough” with the old opener may drift or slam with the new one. Diagnosing this requires winding bars, a working knowledge of door weight, and the judgment to know when a spring has exceeded its cycle life.
We have responded to emergency calls in Los Angeles where a homeowner’s winding bar slipped. The resulting damage to the door, the garage interior, and in one case the homeowner’s hand, far exceeded the cost of professional installation. This is not a skill YouTube can teach safely. The risk profile is comparable to working on a car’s suspension without jack stands - possible in theory, foolish in practice.
240V Electrical Upgrades
Most residential openers run on 120V and plug into a standard outlet near the motor unit. Some newer high-torque models, and certain jackshaft openers mounted beside the door, require a dedicated 240V circuit. Older Los Angeles homes, particularly those built before 1970 in areas like Silver Lake or the original Hollywoodland tracts, may have garage electrical that was never designed for this load.
Upgrading from 120V to 240V involves panel work, proper gauge wire, GFCI protection where required by current Los Angeles electrical code, and permit considerations. The National Electrical Code and local amendments change; what was acceptable in 2010 may not pass inspection today. This is licensed electrician territory, not a homeowner weekend project.
Even 120V installation carries risk if your garage lacks a grounded outlet or if you are tempted to run an extension cord. Openers draw significant current during startup. An undersized or damaged cord is a fire hazard. We have seen melted extension cords in Los Angeles garages where the homeowner prioritized convenience over proper outlet placement.
How to Assess Your Garage Ceiling Before Buying a Kit
Here is the single most overlooked step in DIY opener planning. The product box shows a clean installation with plenty of headroom, perpendicular joists, and a solid header above the door. Your garage may match this. It probably does not. Measure three things before you spend money.
1. Height: The Headroom Number
Standard installation requires 10 to 12 inches of headroom - the space between the top of the door opening and the lowest obstruction (ceiling, ductwork, beam). Measure this precisely. Do not estimate. If you have less than 10 inches, you need a low-headroom kit or a different opener type entirely. Most big-box retailers stock standard kits. Low-headroom hardware is often a special order, and the staff may not know to ask.
Los Angeles has thousands of garages built in the 1940s through 1960s with 8-foot ceilings and minimal headroom. Bungalows in Atwater Village, postwar tracts in the San Fernando Valley, and hillside homes with garage excavations all present this challenge. We carry low-headroom track and quick-turn bracket hardware on our trucks because we encounter it weekly.
2. Joist Direction: The Hidden Obstruction
The opener motor hangs from a bracket that must anchor to ceiling structure. If your ceiling joists run parallel to the door, you can usually mount directly. If they run perpendicular, you need a length of angle iron or strut spanning at least two joists to provide a secure base. This is not included in standard kits. A lag screw into drywall or a single joist edge will pull out under load.
Hillside homes in Los Angeles neighborhoods like Mount Washington or Laurel Canyon often have unconventional framing. Exposed beams, cathedral garage ceilings, or steel I-beams from seismic retrofits change the mounting equation entirely. The kit’s generic instructions do not address these scenarios.
3. Header Bracket Clearance: The Three-Inch Rule
The header bracket mounts above the door opening and carries the front of the rail. It needs solid wood - typically a 2×6 or larger header board - and at least three inches of vertical space above the door’s highest travel point. If your door opening is trimmed tight to the ceiling, or if a soffit or duct occupies that space, you cannot install a standard bracket without modification.
We’ve arrived at Los Angeles homes where the homeowner discovered this conflict after three hours of assembly. The rail was built, the motor hung, and the entire system could not be anchored. The frustration is real, and it is avoidable with a tape measure and ten minutes of honesty about what your structure allows.
Why Low-Headroom and High-Lift Configurations Should Not Be DIY
Most opener packaging does not clearly state this limitation. The assumption is a standard 7-foot door in a standard 8-foot ceiling with standard track radius. Deviate from any of these, and the installation complexity increases dramatically.
Low-headroom track systems use a combination of quick-turn brackets and modified roller placement to reduce the door’s arc as it opens. This changes the geometry where the opener arm connects. The standard door arm length and angle may not work. The opener’s force settings, which are pre-programmed for standard travel, may need recalibration. A door that appears to operate smoothly can be overloading the opener motor with every cycle, shortening its life from years to months.
High-lift and vertical-lift configurations, common in Los Angeles commercial spaces and increasingly in residential garages with car lifts or tall vehicle storage, move the door differently. The opener must be compatible with this track geometry. Standard residential openers are not. Installing one anyway results in binding, premature wear, and potentially dangerous door behavior.
We have replaced openers in Los Angeles auto enthusiast garages where the homeowner installed a standard Chamberlain unit on a high-lift door. The motor strained, the door shook, and within eighteen months the opener failed completely. The cost of the replacement opener, plus our installation to correct the geometry, exceeded what professional installation would have cost initially.
The Actual Cost Comparison: DIY Savings vs. Callback Costs
The financial case for DIY opener installation is straightforward on the surface. A mid-range belt-drive opener costs $250 to $400. Professional installation in the Los Angeles market typically runs $350 to $550 including labor, disposal of the old unit, and adjustment of door balance. The DIY savings appear to be $300 to $400.
This math holds only if everything goes correctly. Here is where it often does not.
| Scenario | DIY Outcome | Typical Callback Cost |
|---|---|---|
| Standard installation, no complications | Saves $300-400 | $0 |
| Missing low-headroom hardware, special order required | Project stalled 1-2 weeks | $150-250 for parts + second visit |
| Door balance off, spring adjustment needed | Opener strains, premature failure | $180-340 for spring work + possible opener replacement |
| Electrical outlet needed or upgraded | Extension cord hazard or electrician call | $200-500 for licensed electrical work |
| Incorrect force settings, door damage | Panel or section replacement | $400-800 for door repair |
| Injury during spring work | Emergency medical costs, lost work | Significant, unpredictable |
At what hourly rate does professional installation make financial sense? If your time is worth $50 per hour, and a DIY installation takes six hours including research, shopping, assembly, and troubleshooting, you have invested $300 in labor. Add the $350 opener. If any complication adds three hours and a $150 parts run, your total approaches $650 - more than professional installation with warranty protection.
Our Garage Door Opener in Los Angeles service includes the 90-Day Done Right Promise, flat upfront pricing stated before work begins, and technicians who arrive with springs, cables, and openers on the truck. Most jobs finish in a single visit. For homeowners who have been burned by contractors before, this structure eliminates the surprise bills they remember.
What the Major Brands Don’t Explain Clearly
Chamberlain, Genie, Clopay, and Amarr all manufacture quality products. Their documentation, however, is written for the ideal installation. The troubleshooting sections address common failures, not structural mismatches. Three gaps matter for Los Angeles homeowners.
First, brand compatibility between door and opener is rarely discussed. A Clopay door with its proprietary bottom bracket and cable drum system may require specific arm geometry that a standard Genie opener does not provide. The door will function, but the connection point experiences unusual stress. We see premature wear at these mismatched interfaces.
Second, MyQ and smart home integration, standard on many Chamberlain models, assumes reliable WiFi coverage in the garage. Los Angeles homes with stucco walls, metal lathe, and detached garages often have dead zones. The app setup fails repeatedly, and the homeowner assumes the opener is defective. A hardwired WiFi extender or Ethernet connection solves this, but the manual does not mention it.
Third, battery backup requirements changed under California law. SB 969, effective since 2019, mandates battery backup on new opener sales in areas with frequent fire-related power outages. Los Angeles County’s wildfire exposure makes this relevant. Not all retailers clearly distinguish battery-backup models from older inventory. A homeowner buying on price may install a non-compliant unit without realizing it.
Common Mistakes to Avoid
- Measuring once, buying fast. The header bracket needs solid wood backing. Many Los Angeles homeowners discover their garage door trim is decorative fascia over hollow space. The bracket pulls out within weeks. Tap the area above your door. A solid thump means structure. A hollow sound means you need a backing board installed first.
- Ignoring the door’s balance after opener installation. Disconnect the opener arm and lift the door manually. It should stay at waist height without drifting. If it slams down or rises on its own, the spring tension is wrong. Running an opener on an unbalanced door burns out the motor. We replace more opener gears from this cause than from any defect.
- Using the included screws in old wood. The lag screws supplied with opener kits assume fresh, solid lumber. Decades-old header boards in Los Angeles garages are often dry, cracked, or partially rotted from roof leaks. Longer, heavier lags or structural anchors are needed. The kit does not include them.
- Programming remotes before testing travel limits. The opener must learn its full open and close positions before remote commands mean anything. Skipping this step results in doors that hit the floor too hard or reverse unexpectedly. The force and travel limit adjustments are not optional calibration; they are safety-critical settings.
- Installing on a door with frayed cables or worn rollers. An opener does not fix mechanical wear. It accelerates it. The new motor’s consistent force will snap a frayed cable or pop a cracked roller out of its track. Inspect the entire door system before adding powered operation. Garage Door Repair in Los Angeles should precede, not follow, opener installation.
- Assuming all openers are interchangeable. Jackshaft openers mount beside the door and require specific track geometry. Direct-drive units have different ceiling clearance needs. A belt-drive conversion from chain-drive may need a different rail length. Match the opener type to your door and garage, not to the best sale price.
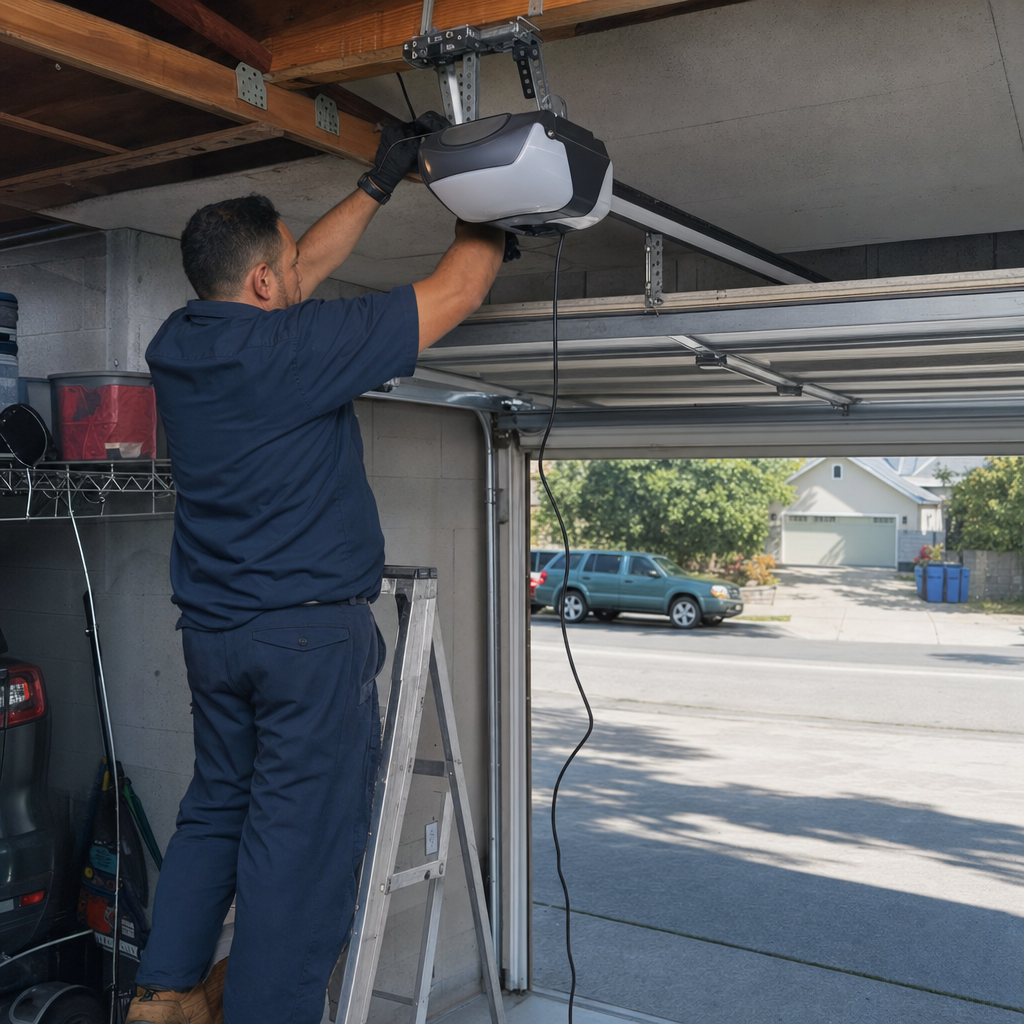
- Working alone on a ladder with a heavy motor unit. Opener motors weigh 20 to 40 pounds. Ceiling mounting requires holding this weight overhead while aligning brackets and starting fasteners. A dropped motor damages the unit, the floor, and potentially the person below. This is a two-person task, minimum.
When to Call a Professional
Call a professional if your garage has less than 10 inches of headroom, if your ceiling joists run perpendicular to the door without accessible structure, if your door requires spring adjustment or replacement, if you need any electrical work beyond plugging into an existing grounded outlet, or if your door uses low-headroom, high-lift, or vertical-lift track. Call if you are not certain about any of these conditions. Uncertainty is itself a signal.
Mainspring Garage Door Co. offers free estimates in Los Angeles, and you can find more guides & resources on our site. A technician will assess your garage, measure your door, and state a flat price before any work begins. No surprises on the bill. If you have already started a DIY installation and hit a wall - literal or figurative - we complete partial jobs without judgment. The 90-Day Done Right Promise applies either way. Call (844) 755-5838.
Frequently Asked Questions
Professional installation in Los Angeles typically ranges from $350 to $550 for a standard residential opener, including removal of the old unit, installation, door balance check, and remote programming. Complex ceilings, electrical upgrades, or low-headroom hardware add to this. Call (844) 755-5838 for an exact quote - estimates are free.
You can safely handle the rail assembly, trolley attachment, and remote programming as a first-timer. The ceiling mounting, door arm connection, and any spring or electrical work require experience. Most competent homeowners with basic tools can complete the safe portions in two to three hours, then call a professional for the critical steps.
Most standard installations take two to three hours from arrival to tested operation. Complications like low-headroom hardware, electrical outlet installation, or door rebalancing extend this. Mainspring technicians arrive with parts on the truck and complete most jobs in a single visit.
A direct replacement of an existing opener on the same electrical circuit typically does not require a permit. New 240V circuits, structural modifications, or new construction do. Los Angeles Department of Building and Safety requirements vary by jurisdiction within the county. When in doubt, we verify permit needs during our free estimate.
The opener is not designed to lift an unbalanced door. The spring system does the lifting; the opener guides and controls. If the door feels heavy manually, the springs need adjustment or replacement. Forcing the opener to compensate burns out the motor. This is the most common callback we see after DIY installation.
Repair makes sense for units under 10 years old with minor issues like stripped gears or failed circuit boards, typically $150 to $300. Replacement is more economical when the motor is failing, the unit lacks safety sensors or battery backup, or repair parts are obsolete. We offer free second opinions on any written estimate to help you decide.
We are factory-familiar with all major brands and install Chamberlain, Genie, LiftMaster, and others based on your door type and usage pattern. For Los Angeles homes with attached garages and bedrooms above, we typically recommend belt-drive units for quieter operation. For heavy or oversized doors, we specify higher-torque chain-drive or jackshaft models. The right match matters more than the brand name.
Yes. Mainspring maintains a permanent 5% discount for seniors and veterans, applied to any repair or installation. We also offer $50 off any repair over $250, a free second opinion on any written estimate, and an $89 seasonal tune-up. These are standing offers, not limited-time promotions.
The Bottom Line
DIY garage door opener installation occupies a middle ground that few home improvement projects do. The assembly work is genuinely accessible. The mounting and integration work is genuinely hazardous when conditions are wrong. The honest assessment is this: if your garage has standard headroom, solid ceiling structure, grounded outlets, and a properly balanced door, a careful homeowner can complete much of the job safely. If any of those conditions is uncertain, professional installation is not an extravagance. It is the square deal that leaves the job done right, with a written promise behind it.
For homeowners in Los Angeles who want the certainty of flat upfront pricing, single-visit completion, and a 90-Day Done Right Promise in writing, Garage Door Installation in Los Angeles from Mainspring Garage Door Co. provides that structure. We have been serving local communities since 1984. We answer the phone with a live person, 24/7, including nights, weekends, and holidays. Call (844) 755-5838 for a free estimate.
Written by the team at Mainspring Garage Door Co., serving Los Angeles since 2016.